Pantry Basics: Non-Dairy Milks

Rice Milk

It seems like every time I go to the grocery store, there are more nondairy milk options. Just the other day, I bought a carton of sunflower seed milk! I haven’t tried it yet, so I’ll have to let you know when I do. As an adult, I’ve never been a big milk drinker. Even with the nondairy varieties, you won’t see me chugging a glassful of milk any time soon. That being said, I always keep nondairy milk in the house for baking, to pour over cereal, to add to tea/milk, and for other random uses that inevitably pop up. When I was in college and still a meat eater, I would buy unsweetened soymilk to eat with cereal (I was a bit lactose intolerant) and cow’s milk for my tea. Then, when I went vegan a few years ago and cut out cow’s milk, I had to find something else to put in my tea in the morning. I’m not crazy about the taste of soymilk in tea (unless it’s a strongly flavored tea, like a spiced chai), so I started searching for an alternative. I also was a little concerned about some of the news at the time that was starting to emerge about the long-term health effects of soy. I tried all of the different nondairy creamers and felt generally ambivalent about them. I finally settled on rice milk as the go-to milk we keep in the house. We buy the 12-pack case at Costco for around $15 and it lasts us for a few months at least. Rice milk is naturally sweet, so buying the unsweetened or at least the ‘original’ kind is preferable, and it has a very neutral flavor, so you can add it to just about anything without changing the flavor. I also keep coconut milk (in the can) and coconut milk beverage (in the carton) in the pantry and as a treat every now and then I’ll buy chocolate soymilk or almond milk (I try to buy the unsweetened and add a little sweetener myself to avoid the added sugar).

The lowdown on nondairy milks…Most of the nondairy milks are fortified with various vitamins and minerals like calcium, iron, B-12 and D, so you can check out the nutritional content to see what you’re getting. I try to buy the organic milks (particularly if I’m buying soy) to avoid any genetically modified ingredients. The flavored milks and even the original varieties are fairly high in sugar, so keep an eye on the sugar content if that’s something you’re concerned about. Also, if you buy a sweetened milk and are baking with it, you may need to cut back on the sugar used in the recipe. I try to buy the unsweetened whenever I can, as they usually tend to be quite sweet naturally. Probably one of the best things about nondairy milks is no cholesterol! You can make your own non-dairy milks, which I’ve heard can be quite easy. I have yet to try it. Have you?

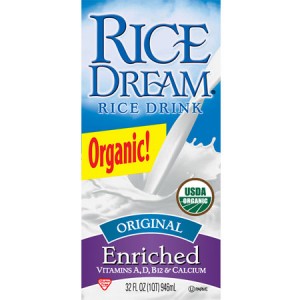
Rice Milk: Rice milk is made from processed rice. The processing makes it naturally sweet, but often cane sugar or syrup is added to sweeten it more. Rice milk is a versatile milk and works well in baking and other uses. It has a thin consistency (like a skim cow’s milk) and is slightly translucent, but has a higher carbohydrate content and lower protein content than cow’s milk. I usually buy ‘Rice Dream’.

Soy Milk: Soymilk is made from soaking dried soybeans and then grinding them with water. Tofu is made by further fermenting/coagulating soymilk. Soymilk has a protein content similar to that of cow’s milk and usually has a thicker consistency than rice milk, and a more distinct flavor. I try to avoid buying nonorganic soymilk in order to avoid genetically modified (GM) soy.

Almond Milk: Almond milk can be made by combining almonds and water in the blender and then pressing through some cheesecloth. It is high in protein, is usually a thicker consistency, and is good for baking. The chocolate almond milk is delicious. The flavor of plain almond milks vary widely by brand, so you just have to try them to figure out which one you like the best. I tend to like the flavor of the Blue Diamond, though it is not organic.
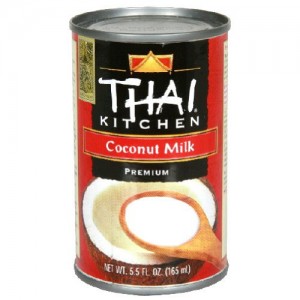
coconut milk in the can

Coconut Milk (in the can): Coconut milk in the can is super creamy and tastes like coconut. It is excellent for curries, for homemade vegan coconut ice cream, for rice pudding, for making chocolate truffles (yum) and all kinds of other things where you would want a very rich, creamy milk and hint of coconut flavor. It stands in well for recipes that would use half-and-half (keeping in mind the coconut flavor). You can get light coconut milk that contains less fat, fewer calories, and is thinner in consistency.

coconut milk in the carton

Coconut Milk (in the carton): This unsweetened Coconut Dream Coconut Drink is pretty awesome for some things. It is creamier than rice milk (not as thick or rich as coconut milk in the can) and it does not have much coconut flavor at all. In fact, in my opinion, it’s practically flavorless–which I happen to think is great. You can get a creamy effect without having to have the coconut flavor. I like to use it in coffee, where half-and-half or whole milk is called for in recipes, in chia pudding, etc.

Hemp Milk: Hemp milk is rich in all of the amino acids that make up proteins, and it is high in Omega 3s and 6s. I’ve only had hemp milk a couple of times, and it has a slight, well, ‘hempy’ flavor. It’s a little bit earthy and fiber-y tasting. I’ve had some outrageous hemp milk soft serve ice cream at Healeo on Capitol Hill in Seattle (if you haven’t been, run there and get some divinely healthy and delicious food, finished off with a vanilla hemp softserve–to die for!) 

For baking, any of the nondairy milks will do. I try to match most closely what a non-vegan recipe would call for. For pancakes, I use rice milk. For pudding, I would use coconut milk (either in the can or in the carton, depending on how rich and coconutty I wanted it). For drinking in tea or coffee, you just have to test them out to see what your tastebuds like! Do you have a favorite go-to nondairy milk or two?


Hunkering Down w/ Double Chocolate Chip Cookies

spring moss in the PNW

The past week or so has been intense with school and work, etc. Eric went back to work last Monday and it’s been a kind of major adjustment for both us having him back to work. Teaching has been so great–the students are wonderful and thoughtful and they say things like “I don’t ever want this class to end!” which, of course, makes my heart sing. I’ve been exhausting myself, though, waking up each night/morning at 3 or 4am in a cold sweat worrying about how the class is going, if they’re learning enough, if the material is effective enough in challenging the status quo, if they’re enjoying the course, etc. We are on the quarter system, which means that we only have 10 weeks together to work through some pretty heavy and thought-provoking material and I’m constantly feeling the press of time and the end of the class looming.

On Saturday, I took four of the students from the class up to Pigs Peace Sanctuary to meet Judy, the pigs, do some work, and see what the sanctuary is all about. It rained for most of the time we were there, but they were all such troopers… shovelling gravel in the rain! Even in the rain and mud, Pigs Peace is a little bit of heaven. The students got to meet Ziggy, the three-legged pig; Maynard, the new piglet; Bailey, the sweetest blind big brown pig; and Allie, a pot-bellied pig who was abandoned on the side of the road in 20 degree weather. We also brought carrots and got to feed the whole herd of pigs, which is always such a treat (for them and for us!). I insisted that they all smell Bailey behind the ears. We just finished reading for class, An American Trilogy: Death, Slavery, and Dominion on the Cape Fear River by Steven Wise. It’s a great book and looks at Smithfield Foods’ pig slaughter facility in North Carolina which was built on land that was formerly a slave plantation and before that was the site of a major massacre of the indigenous community living in the area. One of the points in the book is that you can smell the pig factory farms for miles before you get to them. I wanted the students to smell the pigs living at Pigs Peace because they smell sweet and earthy and like hay–not smelly at all. I try to lean over and take a good long sniff of at least one pig every time I’m there. They each smell different and they each smell amazing.

Part of the reason things have been so stressful is that I’m leaving for New York this week. Poor Eric has to hold down the fort without me. I’m attending the annual Geography conference and presenting a talk called, “Animal Resistance and the Improprieties of Live Property”. I’ve been thinking about the talk for a while, but have not been able to sit down to write it, and so today I finally buckled down to try writing and it’s just not going as quickly as I’d hoped. After I go to NYC, I’m back to Seattle for a day to teach and then back off to Buffalo for the Institute for Critical Animal Studies conference. There, I’m presenting a talk called “Joining the Resistance: Farmed Animals Making History”. The travelling back and forth for these conferences is crazy, but they should both be pretty great. Plus, I’ve got some exciting things lined up on the side while I’m in NYC, which I’ll tell you about later on.

I reached a point in working today when I just couldn’t make myself sit in front of the computer anymore, so I went outside and the first thing I saw was that the moss on our driveway was the most amazing electric green color (see above). I walked to the store and got a few staples (including chocolate chips) and came back and baked some delicious chocolate chip cookies. I made this same recipe on Saturday to take to the pig sanctuary, and I wanted to make some more for eating at home. These are rich, chocolatey, and a good combination of chewy and crunchy. Plus, this would be an excellent time to try out one method of egg substitutes–this recipe uses the ground flax seed and water method.

vegan double chocolate chip cookies

The Recipe: Double Chocolate Chip Cookies

Makes 10-12 medium/large cookies

1 1/4 cups all-purpose flour

1/2 cup unsweetened cocoa powder

1/2 tsp baking soda

1/4 tsp salt

1/2 cup Earth Balance (or vegan shortening)

3/4 cup vegan sugar

1 Tbls ground flax seed mixed with 3 Tbls water

1 tsp vanilla extract

1 cup chocolate chips       

Preheat the oven to 350 F. In a mixing bowl, mix together flour, cocoa, baking soda, and salt. In a small bowl mix together the flax and water. In another mixing bowl or bowl for a stand mixer, cream together the shortening and sugar. Add the flax/water mixture and vanilla and mix. Slowly add the dry ingredients and mix until thoroughly combined. Add the chocolate chips and mix again. Shape the dough into flattened patties (about 3 inches in diameter and 1/2 inch thick for large cookies). Place on a greased or nonstick cookie sheet. Bake for 12-15 minutes. Cool on a wire rack and try not to eat them all at once.

Pantry Basics: Egg Substitutes

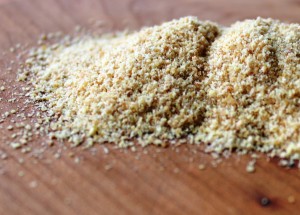
ground flax seed

Long gone are the days when vegan baked goods tasted stale, flavorless, and funky. Some of the best baked goods I’ve ever had or made have been vegan (and I’m a big fan of sweets).

The first thing to remember about starting out with vegan baking (or non-vegan baking for that matter) is that you might have a few flops. That’s okay! Keep trying! I’ve been determined to convert all my old favorite baked desserts into vegan versions. Lots of times they turn out just as I was hoping, but every once in a while, something goes wrong and I just have to try again, maybe with a different egg replacer, maybe by actually remembering to add the baking soda or baking powder, or maybe by baking it for more or less time. They say baking is a science. I’ve never treated it as a very precise science. You will NOT see me levelling off the measuring cups or spoons with the back of knife. When I bake, I am incredibly messy and fairly careless in my measurements. And it’s always (more or less) worked for me. That being said, if levelling off that measuring cup with a knife makes you more comfortable…by all means, stick with that.

When you’re first starting out baking vegan, one of the first things you’ll realize is “Oh shit, what about the eggs?!” Butter and milk are both easily replaced with oil/vegan shortening and nondairy milks. But eggs are a fairly unique ingredient. Sure, there are the commercial egg replacers. But honestly, in 3 years of vegan baking, I’ve never tried them…I’ve always felt like an identifiable substance that I already have in the kitchen is preferable. But if you want to try them–by all means, go ahead, and let me know what you think.

The first step in replacing eggs in baking is to figure out what the egg is used for. Do you even need to replace the eggs? For instance, pancakes turn out perfectly fine without the eggs and without a replacement. Eggs are generally used in baked goods as leavening agents, as binders, and/or to add moisture. What do you get from the egg? What properties do the replacements add? An egg is high in protein, so many of the egg substitutes are also high in protein. Soy yogurt, tofu, flax seed are proteins with binding and moistening properties.  Applesauce and bananas contain pectin and so are good binders and moistening agents. Agar is a good replacement for egg whites.

Applesauce or Banana: Good for cookies, cakes, muffins, or quick breads. Use 1/4 cup of unsweetened applesauce or 1 mashed banana for each egg called for. Applesauce has a neutral flavor. Banana may give your baked goods a slight banana flavor. If you want a lighter texture to your baked good, you can add 1/2 tsp extra baking powder.

Nondairy Yogurt: Plain soy yogurt (or other nondairy yogurts) is a good egg replacer for cakes, muffins, brownies. Use 1/4 cup per egg called for.

Flax Seed: Ground flax is good for chewier, denser baked goods–heartier muffins, quick breads, brownies. Use 1 Tbls ground flax seed mixed with 3 Tbls water per egg.

Tofu: Tofu can be used as an egg replacer in two ways: 1) tofu is a dense egg replacer in baked goods–replace one egg with 1/4 cup pureed silken tofu; or 2) tofu actually can replicate the consistency of eggs in things like quiches, scrambles, etc. For a quiche, choose a softer tofu; for a scramble choose a firmer tofu.

Agar Agar: Agar Agar powder can be found at health food stores or Asian groceries. It is a sea vegetable. Agar can be used to replace egg whites in recipes. Dissolve 1 Tbls agar in 1 Tbls water for each egg white called for. Whip it together, chill it, and then whip it again. [Note: I’m not sure if this works in something like angel food cake, but something where fewer egg whites are called for should be fine].

These are my go-to egg substitutes. There are lots more out there, but with the exception of agar (which can be potentially difficult to find), I like these because they are all readily available at any grocery store and often I already have them in my pantry. Whether you are a beginning vegan baker, or a seasoned pro, you can’t go wrong with Isa Chandra Moskowitz and Terry Hope Romero’s canon of vegan baking perfection: Vegan Cupcakes Take Over the World, Vegan Cookies Invade Your Cookie Jar, and Vegan Pie in the Sky. These will keep you busy with oodles of recipes for heavenly baked goods that will have people asking, “This is vegan?!?”

Flatbread with Tapenade & Vegetables

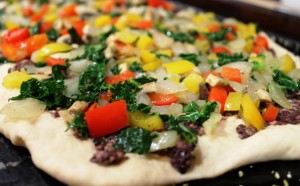
flatbread with tapenade & vegetables

It’s been incredibly busy lately and I’ve been incredibly lazy when it comes to cooking dinner. We’ve been eating out a lot lately, but Eric started back to work on Monday and I decided to make a nice dinner for when he got home on Monday night (and by nice, I mean actually cooking something). Part of my problem with cooking lately is that I come up with ideas, think through the effort they would require, and then decide against cooking anything. LAZY. Or maybe a better way to look at it would be that I’m spending my time doing other school-type things. Either way, it was fun to actually make some dinner on Monday. The day before, I had made another batch of the hard-to-resist kalamata basil tapenade, so we had a big container in the fridge. I made some pizza dough and then made a flatbread topped with the tapenade and some sauteed vegetables.

My sister is a big flatbread fan. When I first asked her the difference between flatbread and pizza, she said “Flatbread’s just fancy pizza”. But when we talked about it again yesterday, she said that pizza typically has sauce, then cheese, then toppings. Flatbread has a little cheese, or none, and the vegetables are usually cooked first before they go on top. Call it pizza, call it flatbread–It was heaven, if I do say so myself–the tastiest thing we’ve had in a while.

The Recipe

Serves 2

FOR THE DOUGH:

1/2 cup warm water (105F-115F)

1 1/2 tsp active dry yeast

1 tsp agave or sugar

1 tsp olive oil, plus a little drizzle for the bowl

1 1/4-1 3/4 cups flour (half whole wheat pastry/half all-purpose)

pinch of salt

1 Tbls cornmeal

FOR THE TOPPING:

1/2-3/4 cup tapenade

1 cup onions, diced

1/2 cup red bell pepper, diced

1/2 cup yellow bell pepper, diced

1/2 cup mushroom, diced

1 large leaf of kale chopped fine

salt & pepper to taste

FOR THE DOUGH: In a mixing bowl, add the warm water, the agave or sugar, and the yeast. Stir to combine. Let sit in a warm spot for 10-15 minutes until the yeast has formed a puffy top on the water. Stir in the olive oil and salt, and add the flour a little at a time. Stir in flour until the dough is a kneadable consistency. Turn out on a floured surface and knead for several minutes. Drizzle a little oil in the empty bowl and place the dough ball in the bowl (rolling it in the oil slightly to coat it). Cover the bowl with a clean kitchen towel and let rise for about 1 hour in a warm spot. When doubled in volume, punch down the dough. While the dough is rising you can prepare the vegetable toppings and make the tapenade (if you haven’t already).

FOR THE TOPPING: Preheat oven to 425F for the baking of the flatbread. Chop all vegetables. You can use any variety of vegetables you like for topping–these are just the ones I had on hand. Saute the vegetables in a little olive oil, adding them in the following order: onions, peppers, mushrooms, kale. Saute until slightly soft. Add a little salt and pepper (keeping in mind the tapenade is salty). Turn off heat and press out the dough.

ASSEMBLY: On a baking sheet, dust a layer of cornmeal to prevent the dough from sticking. On a floured surface, press out the dough to about 1/4-1/2 inch thick depending on how thick you like the crust. Lay the pressed out dough on the pan and spread the tapenade over the dough. Spread the sauteed vegetables evenly over the tapenade. Bake at 425F for 15-20 minutes. Cut into pieces and enjoy.

What would you put on your flatbread?

Cilantro-Jalapeno Roasted Garlic Hummus

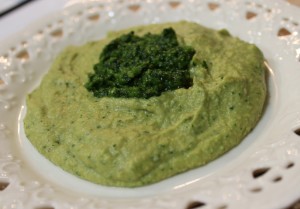
cilantro-jalapeno hummus

This past fall, when my friend Tish and I were crafting together each week, we would periodically stop at Trader Joe’s for snacks before heading to our house to get started crafting. Tish turned me on to the most delicious hummus from Trader Joe’s–it’s their hummus with cilantro and jalapenos. Eric and I rarely go to Trader Joe’s since it’s a bit out of the way and we’d have to make a special trip over there, but I’ve been thinking about that hummus for a couple of months now. Finally, yesterday, Eric and I made it to the grocery store (a long-overdue trip) and I got the stuff to recreate the cilantro-jalapeno hummus. I looked a few recipes online, and ended up drawing inspiration from this recipe at Peas and Thank You and this recipe at Eats Well with Others. We made it last night and it was so good and SO spicy!

The Recipe

For the hummus:

1 1/2 cups chickpeas, peeled if you have the patience for it

1 Tbls tahini

juice of 1 lemon

1/2 cup roasted garlic cloves

2 Tbls olive oil

1/4-1/2 cup water

salt and pepper

For the topping:

1 1/2 cup fresh cilantro

1 jalapeno, deseeded and demembraned

1 tsp powdered coriander

1/2 tsp cumin

1 tsp lemon juice

1 T olive oil

salt to taste

FOR THE HUMMUS: Put all hummus ingredients into the food processor. Begin with just 1/4 cup of water and add more as needed. Blend all hummus ingredients until very smooth. Taste. Adjust seasonings as needed.

FOR THE TOPPING: You may want to taste the jalapeno before hand to see how spicy it is and adjust the amount you use accordingly. I did not taste it ahead of time and ended up with some hot-as-hell hummus. Process all topping ingredients in the food processor until pulverized (or very finely minced). Taste and adjust seasonings accordingly.

ASSEMBLY: Here’s where you have a choice. You can leave the hummus as it is and put it on a plate with some of the topping on top. That way, you can get bites that are spicy and some that are not. OR, you can mix part of the topping into the hummus and eat it that way and top it with some additional topping (this is what I did). Serve with pita, crackers, cut up vegetables or as a spread in sandwiches, etc.


Hot Cereal with Toasted Coconut Bananas & Pecans

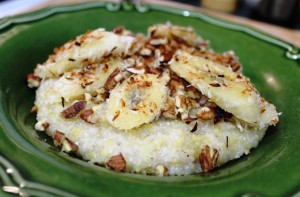
hot cereal with coconut bananas and pecans

I’ve been having to get creative with my breakfasts since we still do not have any oatmeal. For some reason, we have been in a major cooking rut. This rut not only includes not cooking at all, but it also includes not going to the grocery store. Luckily, we’ve got grains in the pantry, and so I’ve had quinoa for breakfast quite a few times, then I moved onto a combination of quinoa and millet (per my Aunt Jere’s suggestion), which was delicious. On Wednesday, we went to the vegetable stand to get some vegetables and fruit–mostly because Maizy needed her broccoli and butternut squash for her meals and yams (for dehydrated yam treats). We stocked up on bananas and lots of vegetables. This morning, I dug around in our big miscellaneous dry food drawer and found some of Bob’s Red Mill Mighty Tasty Hot Cereal which, at the risk of sounding dorky, is ‘mighty tasty’! It’s a mixture of brown rice, corn, buckwheat and sorghum. Gluten-free! I decided to coat some sliced banana in some toasted grated coconut, and fry/grill it up in a little coconut oil. Then I added some pecans. Delish! The banana was warm, creamy and caramelized with the crunch of the toasty coconut on the outside. This would be a great topping for oatmeal, too, if only we had some…But it did remind me how much I love Bob’s Red Mill’s hot cereal.

The Recipe

Serves 1-2

1-2 servings of hot cereal or oatmeal, prepared according to directions on package

1 banana, peeled and sliced

~2 Tbls grated toasted coconut

1 tsp or less coconut oil

handful of pecans, chopped

Cook cereal according to its directions. While the cereal is cooking, slice the bananas. Pour the grated coconut onto a plate and dip the bananas in the coconut, getting a little coconut to stick to each banana slice. Heat a griddle or frying pan with the coconut oil on medium-high heat. When the pan is hot, lay the sliced bananas into pan, and cook until lightly browned, flipping them over to cook both sides (about 3-5 minutes per side). Chop the pecans. Serve the hot cereal in a bowl and top with the bananas and pecans. Enjoy!

Lawsuit Filed Over Orcas’ Enslavement

Source: bbc.co.uk

In the news this week is a ground-breaking story about a lawsuit filed by PETA against SeaWorld on behalf of five plaintiff orcas/killer whales. Charges are being filed against both the Orlando park and the San Diego park for the enslavement of the orcas. The lawyer handling the case, Jeff Kerr, makes the case that these orcas are unjustly enslaved and kept in involuntary servitude–forced to perform and confined to tanks in the parks. For the first time ever, nonhuman animals are being considered under the 13th Amendment that made slavery illegal in the United States in 1865. SeaWorld argued aggressively that the case was a waste of time and resources and lobbied for the judge to throw out the case immediately:

SeaWorld’s lawyer, Theodore Shaw, told the court in San Diego: “Neither orcas nor any other animal were included in the ‘We the people’… when the Constitution was adopted.” ~BBC News

But the legal representation for PETA begs to differ. This lawsuit has been an ongoing process, and despite SeaWorld’s attempts to get the judge to throw out the case, on Monday February 6th, Judge Jeffrey Miller stated that he would consider the case and issue a ruling at a later date. This is a huge step in the right direction for this case. But this case is not just about winning the freedom of the five orcas on whose behalf the case is filed. This is about fundamentally changing the way we think about nonhuman animals and recognizing their enslavement by humans is one step in changing human/nonhuman animal relations. Kerr says:

“It’s a new frontier in civil rights,” Kerr said in his summary of the case. Slavery does not depend on the species of the slave any more than it depends on race, gender, or ethnicity, he argued. “Coercion, degradation, and subjugation characterize slavery, and these orcas have endured all three.”  ~PETA

I thought this was a really interesting topic for discussion about the potential power of law, the legal status of nonhuman animals, and the future of human/nonhuman relations.What do you think about this case and the possibilities for the future?

Roasted Cauliflower

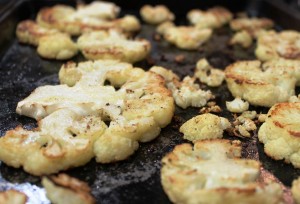
roasted cauliflower

This is the simplest recipe and it is amazing how delicious it is. It is almost buttery, full of good cauliflower flavor, and an excellent side dish to eat with just about anything. The flavor is neutral enough that it pairs well with just about any cuisine. But don’t let that fool you; it definitely has a ‘wow’ factor… such as, “Wow! This is just cauliflower with olive oil, salt and pepper? Wow!” I think cauliflower tends to get a bad rap, or maybe no rap at all. I’ve tended to think of it as a vegetable that I could take or leave. But this preparation works magic on the cauliflower, and since trying it, has given me a whole new appreciation for this vegetable. In fact, a few years ago, we grew cauliflowers and had a bumper crop, and I started eating it raw, roasted, steamed, stewed in curry, etc. Yum! Don’t forget to eat the little crunchy bits on the pan that get extra roasted–they’re the best part.

The Recipe (if it can be called that)

Serves 2-4

1 large head of cauliflower

olive oil

salt and pepper

Preheat oven to 400 F. Remove the leaves from the cauliflower and wash the head of cauliflower thoroughly. Slice the head of cauliflower like you would a loaf of bread, in about 1/2 inch slices. You can leave the big center pieces whole, or you can cut those down into smaller pieces–your choice (I usually leave them whole). Brush a roasting pan or savory cookie sheet with a little olive oil. Lay out the cauliflower slices, brush them with a little olive oil, and sprinkle lightly with salt and pepper. Make sure to toss all the little extra bits of cauliflower on the pan, too. Roast in oven for 15 minutes. Flip all cauliflower slices and roast for 15 minutes more. Remove from oven and eat immediately. Make sure to pick at the little extra roasted bits–Heaven!

Variations: my mom likes to add a sprinkle of ground nutmeg to her cauliflower, or it would also be good with a sprinkle of red chili powder for a little heat.

How do you like to prepare cauliflower?

Pantry Basics: Grains and Legumes

Last week, Serenity in the Storm reader, Kevin posted the following comment on the Breakfast Quinoa post:

“I would love a blog entry where you share what are your vegan pantry staples – for those times when you just need something good to eat and have to use what is on hand.” ~ Kevin

Thanks to Kevin’s inspiration, here begins the series on pantry basics. Initially, I thought about doing one big post on what I tend to keep stocked in our pantry for easy meals, but quickly decided that it would be long and unwieldy. The first pantry basics feature will be on grains and legumes.

—-

Kamut

Keeping a well-stocked pantry is one key to success for maintaining a well-balanced vegan diet. Plus, it’s good to have lots of options on hand to ensure that you don’t feel deprived or like you’re missing out on foods you used to eat. Whole grains and legumes should be the foundation in any vegan kitchen. Not only do they provide great nutrients and filling meal options, but they keep well in the fridge for days. I try to keep at least one container of cooked grains and one of beans or lentils in the fridge at all times for those days when you just don’t know what to eat and aren’t inspired to cook anything spectacular. It’s easy to throw together a meal with grains, beans, a vegetable and some seasonings. Plus, having these around provides a great lunch option whether you take your lunch to work, or eat at home. I buy grains and legumes in bulk, either at Costco (for quinoa and brown rice) or in the bulk section at the local co-op or Whole Foods. These are the grains I try to keep stocked in our pantry:

Short grain brown rice: A good, standard brown rice. Hearty and chewy. The difference between white and brown rice is that brown rice has retained its outer coating, making it a healthier, more nutritious choice. Cooking Instructions: water ratio is 1:2 (grain: water). Bring rice to boil with a tiny splash of olive oil, a little salt and pepper (or other seasonings of your choice). Turn down to simmer, cover, and let cook for 50 minutes. Turn off heat. Let stand 10 minutes.

Arborio rice: Arborio is a short-grain Italian rice, used for risotto. It is very creamy and you can see a recipe for risotto here.

Sweet brown rice: Sweet brown rice is a sticky rice, good for dessert rice dishes, or for sushi. Cooking instructions: water ratio is 1:2 (grain: water). Bring rice to boil with a tiny splash of oil. Stir once. Cover with lid. Reduce heat to simmer and cook 50 minutes. Remove from heat, let stand in covered pot for 10 minutes. Fluff with fork, and for sushi rice, add salt and brown rice vinegar to taste.

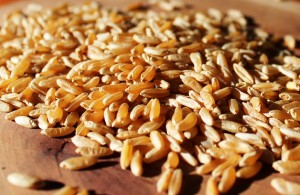
Kamut: An ancient grain form of wheat (much larger than normal wheat). This grain is one of my favorites. It’s very chewy and nutty. I find that I like to eat it with nothing on it because it’s so flavorful. It also has a lower gluten content than regular wheat. Cooking Instructions: Cook using the abundant water method (like you would cook pasta), simmering for 50 minutes. Drain water.

Quinoa

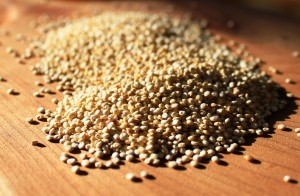
Quinoa: Quinoa commonly comes in two colors–red and white. I personally adore the red variety, but usually buy the white variety because it’s what is available in bulk at Costco and tends to be cheaper than red in other bulk sections. Quinoa is a complete protein with a nutty flavor. Good as a savory or sweet dish, depending on what you add. Cooking instructions: water ratio is 1:2 (grain: water). Bring quinoa and water to boil. Stir once. Cover with lid and turn down heat to simmer for 15 minutes. Turn off heat and let sit for 5 minutes. Fluff with fork.   

Oats: There are all kinds of oats out there. I generally try to stay away from the quick-cooking oats because I figure they are further processed than other varieties and they’re a little mushier, in my opinion. Steel cut oats are oat groats which have been cut down from their original size. Rolled oats are steel cut oats which have been rolled/flaked (there are different levels of the rolling, which produce the regular, quick-cooking, and instant varieties). I like Bob’s Redmill Steel-cut oats and their rolled oats. Also, Bob’s Red Mill has gluten-free oats available.

Cornmeal: Coarse-ground cornmeal is ideal for polenta or for grits. Finer ground cornmeal is used for things like cornbread. I love cornmeal in all its forms.

Israeli/Middle-Eastern Couscous: Not a whole grain, but a fun and delicious pasta-like grain in tiny ball shapes. Cooking instructions: Boil using abundant water method for 10-12 minutes (taste for tenderness). Drain water.

Millet: An ancient grain with a slight nutty/corny flavor. Cooking instructions: water ratio is 1:2 (grain: water). Bring millet and water to boil. Stir once. Cover with lid and turn down heat to simmer for 15 minutes. Turn off heat and let sit for 5 minutes. Fluff with fork.

Bulgur: Bulgur is a form of wheat, made by boiling, dring and cooking whole wheat grains. If you are going to eat it raw, like in tabouleh salad, you can simply reconstitute it by soaking it in water for an hour or so (ratio of 1:2, bulgar: liquid). You can also throw it in soups or eat it as a breakfast cereal.


black beans

Legumes, such as beans and lentils, are an essential staple for any vegan cook. Recently, I’ve been making an effort to buy only dried beans and lentils in order to avoid the canned food thing. Many canned foods contain BPAs and they also use unneccessary packaging. That being said, I usually keep a can or two of beans in the house for emergency situations when I don’t have time to cook them from scratch.  Cooking instructions for beans and lentils: To cook beans from scratch, you must first wash the dried beans in cold water and pick out any rocks, dirt, etc. Put beans in a large bowl and cover generously with water. Soak overnight. Note: you do not need to soak lentils. For bean/water ratio and cooking times, see below. My favorite beans and lentils:

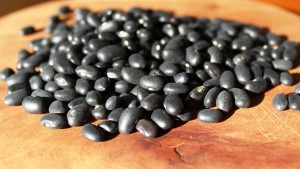
Black Beans: For chili, stews, refried beans, bean salads, burritos, beans and rice, etc. black beans are great. It’s probably my favorite all-purpose bean and I’ll tend to throw these in anywhere I can. Cooking: 1 cup beans: 8 cups water, simmer for 1.5 hours (Yields 4 cups).  

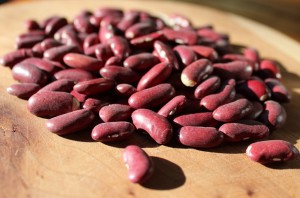
kidney beans

Kidney Beans: I like kidneys beans for Chipotle Chili, or for the Indian dish, Rajma, or for any other dish where a hearty bean is called for. Cooking: 1 cup beans: 6 cups water, simmer for 1 hour (Yields 4 cups).  

Great Northern Beans: A variety of white beans, these are good for baked bean recipes or for minestrone/ vegetable soups. The Basil, Kale and White Bean Soup uses these beans. Creamy and lightly flavored. Cooking: 1 cup beans: 7 cups water, simmer for 1 hour (Yields 4 cups).

Chickpeas/Garbanzo Beans: Chickpeas/Garbanzo beans are used in dishes like hummus, or in salads, soups, or curries. I like the Curried Chickpeas recipe, but chickpeas are a highly versatile beans with lots of different uses. Honestly, I usually just buy canned chickpeas because I don’t use them that often, and when I do, it’s usually spontaneous.

Pinto Beans:  I grew up on pinto beans cooked in pressure cooker. Along with black, pinto has always been our go-to bean. Available cheaply in bulk and really tasty. Cooking: 1 cup beans: 6 cups water, simmer for 1.5 hours (yields 4 cups).

Red Lentils: These lentils do not have the husk and so they break down quite a bit when cooking. For a lentil stew, these are great. Cooking: If not adding to stew, cook 1 cup lentils: 1.5 cups water. Boil water first, add lentils, boil for 2-3 minutes. Reduce heat to simmer and cook until tender (about 25 minutes).

Green Lentils: Green lentils are often the cheapest and highest in protein of the options at our local co-op. They are large and hold their shape fairly well. A great ‘everyday lentil’. Cooking: If not adding to stew, cook 1 cup lentils: 1.5 cups water. Boil water first, add lentils, boil for 2-3 minutes. Reduce heat to simmer and cook until tender (about 45 minutes).

French Green Lentils:  These are tiny lentils that are a blackish green color dried, and add a nice ‘pop’ to the dish they’re in. They hold their shape very well and are quite tasty, but tend to be more expensive than the brown lentils. Cooking: If not adding to stew, cook 1 cup lentils: 1.5 cups water. Boil water first, add lentils, boil for 2-3 minutes. Reduce heat to simmer and cook until tender (about 45 minutes).

What are your favorite grain and legume staples? What have I forgotten?

Breakfast Quinoa

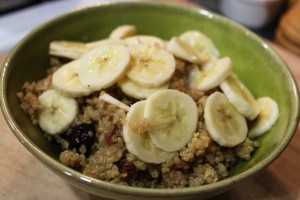
breakfast quinoa

Almost every morning I have oatmeal for breakfast. Lately I’ve been getting steel cut oats and cooking a pot that will last for two or three days. I cook them up plain and then add chopped nuts and fruit depending on my mood. This week, we ran out of oats and yesterday I woke up and had no idea what to eat for breakfast. I pulled some quinoa out of the cupboard and made up a batch of breakfast quinoa. This was really filling and sustained me for a good part of the morning (maybe even longer than the oatmeal normally does). You can add whatever mix-ins you like, and top it with whatever you’ve got lying around. I used dried cherries, dates, pecans, and sliced banana. But other things that come to mind are berries, toasted coconut, raisins, maple syrup, etc.

The Recipe

Serves 2-3

1 cup uncooked quinoa

2 cups water

sprinkle of cinnamon

1/2 tsp vanilla

handful of chopped dried cherries

handful of chopped dates

handful of chopped pecans.

Put the water and quinoa in a pot. Add the cinnamon and dried fruit. Bring to a boil, turn down to a simmer, cover and cook for 15 minutes. When finished cooking stir in the pecans and vanilla. Serve in a bowl and top with fresh banana slices and/or a little coconut milk if you like.

What’s your favorite quinoa or oatmeal toppings?