Photo Chat: Introducing the Lightbox

1. Abigail in the kitchen, daylight bulbs; 2. Abigail in lightbox; 3. Abigail in the morning sun

Eric says the slogan for our kitchen should be “Don’t eat that!! I have to take a picture first!” And it’s true—many of our meals are delayed slightly by a quick photo shoot before we eat. I have also started taking more time plating our food and taking care to try to make it look nice. I love the aesthetics of making food look pretty when it’s served, but I also try not to go too overboard. For example, setting up a whole little scene for the photo shoot is a little beyond what I’m up for at this particular moment.

Since I started the blog almost a year ago, I have been trying to improve the quality of the photos I post. I started out using my camera phone for all pictures I took. I have an Android and the camera on it is certainly adequate for snapping shots. But I really wanted to step it up a notch and so for Christmas, my family pitched in to help us buy by far the fanciest camera I’ve ever had—a Canon Rebel T3i. We have still only watched the first 15 minutes of the instructional DVD and have only learned one custom setting so far. But luckily that setting is the close-up portrait setting with blurred background—great for food photography. I have a lot to learn and would love to take a class someday on composing good shots and using the camera to its full potential.

One of the issues we had when I was still shooting photos with my phone was the lighting. I’ve heard many food bloggers say that taking photos in natural light or outside is the best kind of light. Last fall, when I was using my phone, we were coming into the darkest days of the year when, this far north, there just aren’t that many good daylight hours. I ended up taking most of those photos in our kitchen, which has terrible natural lighting. We had normal energy-saving light bulbs in the kitchen and all of my photos had a really yellow tint. So we replaced the light bulbs in the kitchen with (the equivalent of 100 watt) energy-saving daylight bulbs, which do not have that yellow quality. They are very bright and white and took some getting used to, but they improved the quality of the photos quite a bit. Until last week, I’ve been using the Canon to shoot photos either outside, or in the kitchen under the daylight bulb lights. 

I’d read some suggestions from other bloggers for improving photography and one of the common suggestions is to make a light box. A light box is a great for photographing food at night, or if you just don’t have the right natural light for taking pictures. I finally decided last week to go ahead and try making the light box. I used this tutorial to make the light box, but I mostly used materials we already had around the house. I cut up a white sheet for the white sides and used duct tape and a box cutter we already had. I bought a box, light bulbs, and one more clippable light (we already had two) and ended up spending about $15 on the light box. I made it in about an hour and immediately Eden checked it out:

Things I try to think about when taking a photo:

  • What quality do I want in the picture and what am I capable of getting at this particular time of day (i.e. do I have sun or not)? I much prefer the photo of Abigail in the sun at the top to the others, for instance, but I prefer the Canon shot of the blueberries in the light box to the cloudy day photo.
  • Should I even photograph the food? In other words, does the food look appetizing? Sometimes a dish just doesn’t look pretty when it’s cooked. Sometimes it’s okay to not take a photo of the finished dish. Instead, I might take a picture of the raw materials, like whole uncooked veggies or fruit.  
  • What is the background and what dishes should I use? A printed pattern might work nicely for a monochromatic food item, but usually a solid color or white is a good way to go to really feature the food itself.    

Here are a couple of examples of the differences in the photography. In the first, I’m using my Android phone in three different lighting environments:
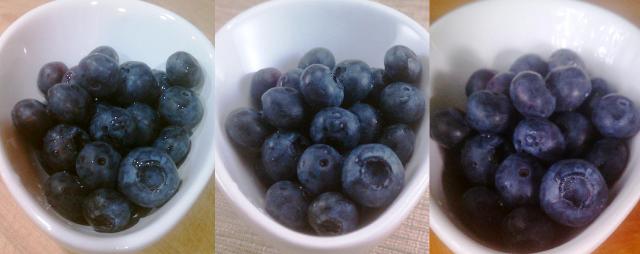
1. Kitchen, daylight bulbs 2. Light box 3. Outside, cloudy day

In the second, I’m using the Canon Rebel in the same three different lighting environments:
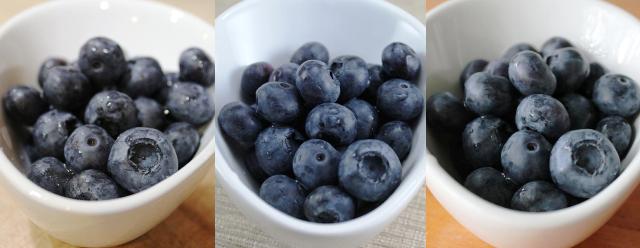
1. Kitchen, daylight bulbs 2. Light box 3. Outdoors, cloudy day

As you can see, there are subtle differences in the photos. In the first set, taken with the phone camera, the kitchen and the outdoor photos are more heavily shadowed on the fruit. The one taken in the light box might be the best choice (though it’s a little blurry). And yet, the colors are truer in the outdoor photo. The berries are closest to their natural color in that one.

In the second set, taken with the Canon, I prefer the light box photo because you can see more of the berries clearly without being obscured by shadow. I also like the color the best in this one. If I had had sun outside to take these pictures, the results would have been different.

Which look do you like best? Do you have any tips for taking better food photography? I’d love to hear them!

Raspberry Shortcake


I had some disappointing news on Monday. I was rejected from another grant for research funding. I started working on this one more than 15 months ago and had gone through one rejection and rewrite already, so this came as a big disappointment at the end of a very long and exhausting process of waiting, revising, waiting, waiting and more waiting. I woke up on Tuesday not at all enthusiastic about thinking about my work, so I spent the entire day cooking—something that I find fun, relaxing, and a wonderful distraction. I’ve mentioned that I’ve been trying to eat more raw foods and cut down on the sugary foods, but yesterday I just wanted some cooked and sweet comfort foods.

When I was a kid, my mom used to make strawberry shortcake with homemade biscuits and homemade whipped cream. We would pile them high with layers of strawberry and whipped cream and then dive in. Even now, I think of this as some serious summer comfort food dessert.

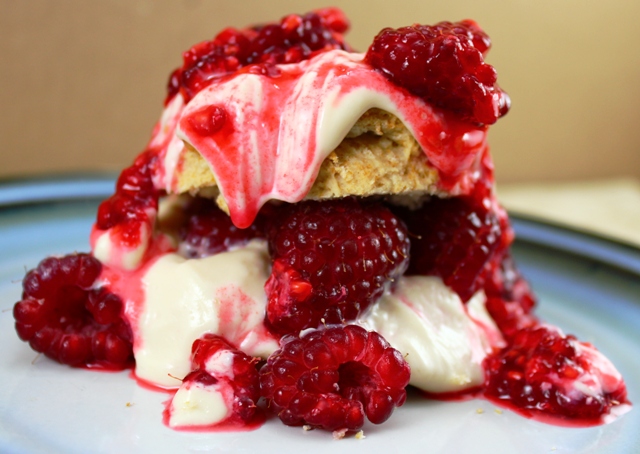
Yesterday, I went to the vegetable stand and they had half-flats of local raspberries for $6. I bought one, knowing I had to do something that would use up a lot of them at once since they don’t tend to keep for long. My dear friend Karen came over for brunch yesterday and I made cornmeal waffles with a cinnamon-ginger raspberry-blueberry sauce and fresh berries on top. That used up some of the berries. Last night, Eric’s mom and her husband came for dinner and I decided to try out a raspberry shortcake—a spin on a traditional strawberry shortcake, but vegan and, of course, with raspberries. I modified my blackberry scone recipe from last summer—cut it in half and omitted the blackberries. Then I made a batch of the white chocolate mousse from the raspberry white chocolate layer cake. I made a raw raspberry sauce and used additional fresh raspberries to assemble the desserts. Everyone agreed that they were pretty divine and definitely blog worthy.

The components for this dessert can be made well ahead of time and then assembled just before serving.

The Recipe

Makes 8

FOR THE SCONES:

2 cups unbleached flour (you can use part whole wheat, if you prefer)
1 1/4 Tbl baking powder
3 Tbl sugar (or other sweetener)
1/4 tsp cinnamon
pinch salt
1 1/2 tsp apple cider vinegar
1/6 cup oil
2/3 cup non-dairy milk (or more if needed)
1 tsp vanilla
 
Preheat oven to 350 F. Mix the dry ingredients in a large mixing bowl. In a separate bowl, mix the wet ingredients together. Make an indent in the dry ingredients and add in the wet ingredients.Using a fork, gently fold wet ingredients into dry. This dough should be treated like biscuit dough. In other words, handle it as little as possible. Sometimes I use my hands to fold the dough a bit at the end. Flour a clean surface, or use a piece of parchment paper to cover a clean surface. Transfer dough to surface and press gently with your hands to flatten the dough out to 3/4 inch thick.Using a biscuit cutter, a knife, or a cookie cutter, cut out circles the scones. Place them at least an inch apart on a non-stick pan, or on a greased cookie sheet. Bake for 18-20 minutes. 

FOR THE MOUSSE:

one 12 oz vegan white chocolate chips

1 package of aseptic silken tofu, extra firm (the kind that doesn’t need to be refrigerated)

2 tsp maple syrup or agave

1 tsp vanilla extract

While the scones are in the oven, make the mousse. In a food processor, blend the tofu, sweetener and vanilla until perfectly smooth. In a double boiler (or bowl set over a pot of water), melt the white chocolate chips. When the chocolate is melted, pour into the food processor and blend with the tofu until perfectly smooth and well combined. Refrigerate in a covered bowl for 2 hours or more (this can even be made the day before).

FOR RASPBERRY SAUCE:

2 cups of fresh raspberries + 2 cups raspberries for assembly

1 1/2 tsp lemon juice

1 tsp maple syrup

In a bowl, mash 2 cups of the raspberries with the lemon juice and maple syrup. This will turn saucy quickly with some mashing and stirring. Taste and adjust, adding more sweetener or lemon juice if you desire (keeping in mind the mousse is quite sweet). Reserve 2 cups (or more) whole raspberries for assembly.

ASSEMBLY:

Just before you are going to serve dessert, slice the scones in half (like a bagel). Place the bottom half on a plate, spoon some cold mousse on the scone. Add some whole raspberries. Put the other half of the scone on top and add another dollop of mousse. Spoon some of the raspberry sauce on top and serve. Enjoy!

Do you have a favorite raspberry dessert? How about blueberries (I have two pounds in the fridge and have to figure out something to do with them!)?

Market Greens: Garlic Rapini

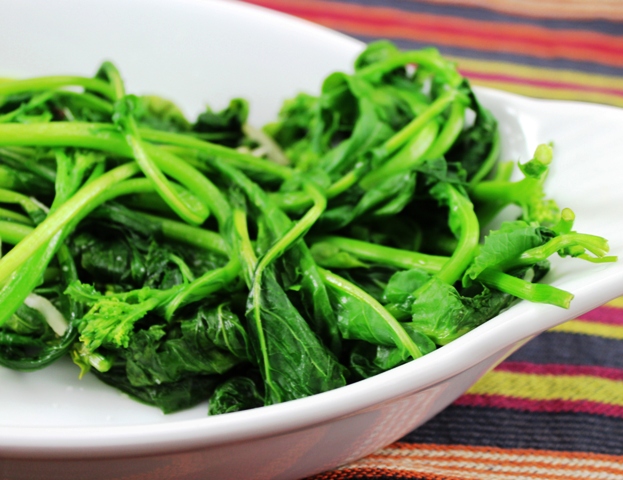
I’ve been frequenting the farmers market lately. In fact, I went twice last week. Going to the farmers market is a great way to get inspired to cook and inspiration is something I’ve been lacking lately in the cooking department! I love how abundant the farmers market feels—how appealing and delicious the fruits and vegetables look in their raw form. On Sunday, my dear friend Tish and I went to the West Seattle farmers market (not knowing that it was also the West Seattle Street Fair—parking was hellacious). Once we found parking, the market was a delight—it was doing this Seattle mist rain thing, which I happen to love, and there was lots of amazing food. We each filled our shopping bags with summer produce. I got corn, sunflower sprouts, barley, cracked kamut, cucumbers, radishes, carrots, kale, walla walla onions, peaches, pluots, and rapini. Rapini, a.k.a. broccoli rabe, is a lovely nutty, somewhat bitter green with crunchy stalks, tender leaves and sometimes little yellow flowers.

This preparation is so easy I wouldn’t really consider it a recipe, but it’s a good go-to preparation that you can use for any greens. Lightly steaming/sauteeing greens helps to eliminate some of their bitterness.

The ‘Recipe’

For one bunch of rapini or other greens

1 bunch rapini (or other greens)

1/2 Tbls coconut oil (or olive oil)

2-3 cloves garlic, minced

splash of water

salt & pepper to taste

In a large pan, heat oil over medium heat. Add garlic and lightly saute for a couple of minutes. Rinse greens and add them to the pan. Cover immediately with lid and let steam for a moment. Check frequently and turn the greens so they cook evenly. You may need to add a splash of water to the pan, if the pan becomes too dry. Cook only until the greens have turned a bright green (should be approximately 5 minutes or less). The stems should be easily pierced with fork, but still slightly crunchy. Add salt and pepper to taste. Serve and enjoy.

Reflections on Religion and Activism

I had the opportunity about a month ago to read and review an amazing book for Our Hen House—Animals and World Religionsby Lisa Kemmerer (review was posted today). This book in many ways restored my faith in the potential of religion to make social change.

When I was growing up, my relationship with religion involved a semi-tumultuous exposure to Christianity and a rather benign exposure to Judaism and Buddhism. Despite being raised sporadically attending an Episcopal Christian church, I turned to studying Tibetan Buddhism in high school. In many ways, the teachings of Tibetan Buddhism resonated with the way I had been raised, with its commitment to love and compassion for sentient beings. In other ways, Tibetan Buddhism gave me refuge as an open-hearted and non-judgemental practice that did not require what at the time I thought was a tenet of Christianity—to ‘believe’ or go to hell (I know now this was just one interpretation of Christian teachings). One of the primary mantras of Tibetan Buddhism is, ‘love and compassion for all sentient beings.’ I realize now that it was that practice, paired with being raised in an active social justice household, that set the stage for my journey to veganism and advocating for anymals. But at the time, Tibetan Buddhism saved me in small ways. It taught me the importance of trying to bring compassionate practice into every moment of my day (of course, I fail at this most of the time).

When I was 17, I would ride the bus to the local university for night classes. Riding the bus definitely can be an experience that tests patience and can make one cranky, especially at the end of a long day. People can be rude and loud and annoying. In many ways, this was the perfect place to practice compassion. I would sit quietly on the bus and start by watching one person. I would watch them doing whatever they were doing and try to love them just as they were. No matter how long it took, I would sit there watching until I picked out one quality that I thought was lovable. Sometimes it was the deep smile lines in their faces from years of laughter. Sometimes it was how worn their hands were. Sometimes it was the way a parent held their kid on their lap, or the way a child asked questions of the person sitting across the aisle from them. Whatever that single quality was, I would meditate on that until I felt that I truly could love that person—whoever they were. And then I would move on to the next person. Occasionally, I would make it all the way around the bus. Other times, I wouldn’t make it past one or two people. Once I found that one thing, feeling compassion for that person became easier.

Now, I think back to that time and in some ways, I feel sad about how hopeful I was—that if we just practiced compassion in our daily lives, we could change the world. All you need is love…Doop dee doop dee doop. (I was listening to The Beatles’ canon at the time.) Now, studying the lives of anymals in the food system, the world’s problems seem much more complicated than just calling for more compassion. The exploitation of anymals is tied to such complex political, economic and social processes. And yet, Lisa Kemmerer’s book helps to restore my faith in the power of faith and the simple power of an unwavering commitment to compassionate practice. Kemmerer outlines how all major religions, at their core, advocate love and compassion (specifically for all animals–human and otherwise). Clearly, throughout history, we have seen what immense power religion has to move vast populations to action (albeit frequently actions like war and genocide). What is so moving about Kemmerer’s book, however, is how she shows the potential religion has to advocate a call to compassionate action for anymals. 

What are your thoughts on religious practice as activism? Have you seen ways in your own life that religion has been a powerful catalyst for compassionate social change?

Avocado Corn Salad with Lime

There’s something about that fresh summer produce that makes me want to eat things raw, and the fact that the weather is hot makes it more unappealing to turn on the stove or oven. Earlier this week, I posted the raw zucchini ‘caprese’ salad. Today, I’ve got for you a simple salad that celebrates fresh, raw corn straight from the cob, creamy avocado chunks, and cherry tomatoes. Dressed with only lime and salt and pepper, this salad is quick and easy to make. Its simplicity is part of what makes it so delicious.

The Recipe

Serves 2-4 depending on serving size

2 ears of raw corn

1 large handful cherry tomatoes, quartered

1 avocado, cut in small chunks

juice of 1 lime

salt & pepper to taste

Cut the corn off the cob and break the large pieces up with your hands so they are all individual kernels. Place is a medium mixing bowl. Toss in the quartered cherry tomatoes and avocado chunks. Add the lime juice and a sprinkle of salt and pepper. Stir gently—the avocado is delicate. Taste and adjust seasonings as needed. Serve immediately.

Tears and Laughter

The work I’ve chosen to do—confronting the exploitation of anymals in the food system—is perhaps one of the most depressing subjects I could have chosen to dedicate my life to. When I first started down this path, my mom said to me, “Couldn’t you choose something a little less overwhelming and depressing? This is just so dark.”

In retrospect, I suppose I could have chosen any number of topics for my graduate work that would have been a lot easier to think about. Less dark. Less soul-crushingly sad. And certainly less controversial. But these truths exist. They’re in the world. And these truths about food production implicate all of us with every bit of meat, dairy or eggs we eat. Shedding light on the lives of anymals in the food system is so much more than a dissertation topic for me. It’s my life’s work. My family understands this really well, especially seeing how this school work has started us down a path of transformation—it made some of us vegan and it made us think in a new way about all animals and the structures of power and domination that have been so normalized in our psyches.  

I think fairly regularly about emotional reactions to this material–my own and others’. I imagine that pretty much anyone who is dialed into thinking about the state of the world is suffering from at least some fairly regular low-grade depression and anxiety. It’s hard not to feel depressed when you educate yourself about these things. But of course, there’s also amazing beauty and compassion and light in the world to balance out the darkness. The other day, I shared with you a trailer for the film ‘Midway’. It looks like an amazing film, but I sobbed consistently through the trailer. First, I cried because of the beauty of the albatrosses living their lives—flying, caring for their young, etc. Then I was crying because of the impact of human arrogance and carelessness on their lives. And finally, I wept because of the magnitude of thinking about the albatross as one symbol of a much much larger problem. 

Yes, it was a pretty epic three minutes. Afterwards, I was feeling slightly drained and very cranky. But I dragged my sorry ass up to Pigs Peace to do some barn painting because that’s what I was scheduled to do. Spending time there, with Judy and the pigs, represents the other end of the emotional spectrum. Admittedly, sometimes I do feel like I could cry from joy when I’m at Pigs Peace, just like Oliver.

But, watching the pigs eating carrots, giving the dogs some scratches and talking with Judy, I spent the afternoon laughing. There is such amazing healing power in laughter. Laughing with good friends, spending time laughing and playing with anymals who are happy and well cared for, joking around about the absurdity of how depressing our work can be—these are the things that bring light into the dark.

Thinking about laughter, I’ll nudge you over to a short piece I wrote at MindBodyGreen—“5 Reasons to Laugh More.”

Raw Zucchini ‘Caprese’ Salad

I’ve been trying to eat more uncooked fruits and vegetables lately. It’s certainly not a hardship eating more raw fruits and vegetables in the middle of summer when there is an abundance of fresh produce. This easy salad celebrates the zucchini and basil we have coming into our garden and mimics the flavor profiles of a caprese salad. In another few weeks, I’m hoping I will be able to make this with tomatoes from our garden (rather than from the vegetable stand), but right now our tomatoes are still green on the vine.

The Recipe

Serves 1-2

1 1/2 cups julienned, shredded or very thinly sliced raw zucchini

a handful of cherry tomatoes, halved

a small handful of fresh basil, minced

1 tsp balsamic vinegar (or to taste)

salt and pepper to taste

Put zucchini, tomatoes and basil in a bowl. Drizzle the vinegar over the top and toss. Add a little salt and pepper and taste. You may want to add more vinegar, salt and pepper depending on your preference. Serve alone as a light lunch or as a side for a full meal.

Do you have any seasonal fruit or veggie recipes you’re excited about lately?

Film as Activism: Midway

“Do we have the courage to face the realities of our time? And allow ourselves to feel deeply enough that it transforms us and our future?”

~Midway Film, Chris Jordan 

MIDWAY : trailer : a film by Chris Jordan from Midway on Vimeo.

“Near the heart of the Pacific Ocean, Midway Island is one of the most remote places on Earth, and the iconic site of a world-changing naval battle. Today Midway is inhabited by a million Laysan albatrosses– magnificent and beautiful seabirds who range over the entire Pacific from their home base on the island. Midway is a multi-layered kaleidoscope of natural wonder and human history, and it also serves as a powerful lens into a shocking environmental tragedy: tens of thousands of albatrosses lie dead on the ground, their bodies filled with plastic from the Pacific Garbage Patch.

Returning to the island over several years, our team has witnessed and filmed cycles of birth, life, and death of these birds as a multi-layered metaphor for our time. With internationally acclaimed artist Chris Jordan as our guide, our film will walk directly into the fire of horror and grief, facing the immensity of this tragedy—and our own complicity—head on. And in this process, we discover a unexpected doorway to a deeply felt experience of hope, beauty and reverence for the mystery and miracle of our world. Stepping far outside the stylistic templates of traditional environmental or documentary films, MIDWAY will take viewers on a lyrical guided tour into the depths of their own spirits, delivering a profound message of renewal and love that is already reaching an audience of millions of people around the globe.”

~Midway Film

You may have seen Chris Jordan’s work elsewhere. This looks like an amazing and important film project. They are currently raising funds to complete the film. There are only 7 DAYS LEFT to raise funds on Kickstarter.

What do you think of this trailer/film project?

Raspberry White Chocolate Layer Cake


When I was a teenager growing up in Pittsburgh, a small catering kitchen and cooking school opened around the corner from our house, called Food Glorious Food. Brad and Tom are the owners and they have grown the business into a successful neighborhood staple, offering a bakery several times a week. Lines are out the door to get their amazing baked goods. Sadly, they do not sell anything vegan. 

Working for Brad and Tom was my first job. Tom is an amazing pastry chef and his signature cake is called the White Lily Cake. It’s a white layer cake with white chocolate mousse filling, embedded with fresh raspberries and covered with a whipped cream icing. While working at Food Glorious Food, I never did get the recipe for the White Lily Cake (it’s a secret), but I’ve dreamt about that cake for years.

Last week, I decided to go for it and try to make up a vegan version of the cake. And you know what? I think this one comes pretty damn close. The cake is a bit more dense, I used a cream cheese frosting instead of whipped cream, but the flavors are very close to the original. I’m not going to lie—this cake is a lot of work, but it is well worth the effort in my opinion. You could make it less of a production by cutting the recipe in thirds or half and making the cake one layer or two.

THE RECIPE

For a 9-inch three layer cake

FOR THE CAKE:

3 cups of nondairy milk

4 tsp apple cider vinegar

1 cup nondairy yogurt

3 Tbls vanilla extract

1 1/3 cup vegetable oil

2 cups vegan sugar

5 cups unbleached all purpose flour

1/2 cup tapioca flour (or you can use cornstarch)

3 tsp baking powder

2 tsp baking soda

2 tsp salt

Preheat oven to 350 F. In a bowl, mix the milk and vinegar to curdle. Add yogurt and stir. Add remaining wet ingredients and sugar and stir well. In a separate bowl, mix dry ingredients. Add dry ingredients to wet and mix until no large lumps remain.

Grease three 9-inch round cake pans. Divide the batter among them. Bake the cakes for 35 minutes or until toothpick comes out clean. NOTE: I don’t have three cake pans, so I baked two cakes first and then transferred them to cooling racks and baked the third one after that.  

FOR THE MOUSSE:

one 12 oz bag of vegan white chocolate chips

one package of aseptic (the kind that doesn’t need to be refrigerated) silken tofu, extra firm

1 Tbls maple syrup or agave

1 tsp vanilla extract

In a food processor, blend the tofu, sweetener and vanilla until perfectly smooth. In a double boiler (or bowl set over a pot of water), melt the white chocolate chips. When the chocolate is melted, pour into the food processor and blend with the tofu until perfectly smooth and well combined.

FOR THE FROSTING:

NOTE: You can use a vegan whipping cream instead of the cream cheese frosting, if you find one you like.

1/2 cup vegan cream cheese

1/2 cup vegan shortening

3 cups vegan powdered sugar

2-3 tsp vanilla extract

1 tsp lemon juice (or to taste)

With an electric mixer, blend the cream cheese and shortening until smooth. Add the powdered sugar a little at a time and blend until smooth. Mix in the vanilla and lemon juice and adjust to taste accordingly.

ASSEMBLY:

3-4 cups of fresh raspberries

After the cakes have cooled, you can make the mousse. Once the mousse is made, place the first cake layer on a plate. Spread half of the mousse on top of the first layer. Lay fresh raspberries in the mousse. Really pack them in there side by side. Add another layer of cake on top. Spread the rest of the mousse on top of the second layer of cake and repeat the layer of raspberries. Place the third layer on top. Place the cake in the fridge while you make the frosting. Make the frosting. Hint: the frosting looks best if you spread it on the cake in two phases. First, cover the whole cake with a very thin layer of frosting. Place it in the fridge and let it chill. This will make it easier to get a nice looking top layer of frosting. Add the second layer of frosting and top the cake with fresh raspberries or edible flowers. Keep refrigerated until ready to serve.

Enjoy!

Sharing Testimony: An Activist Project for Animals

I hope you all had a fun and safe 4th of July. Here, we had fairly minimal animal freak outage, which was good. Maizy had a few moments where she hid under the table, and a few more where she took refuge hiding completely under a blanket on the couch. But otherwise, everyone seemed to survive the fireworks. I, for one, can’t stand fireworks. I’ve always despised them. I know…they’re pretty, they’re supposed to be patriotic, they’re celebratory. But all I can think is how loud, dangerous and unnecessary they are. Even as a little girl, I dreaded the 4th of July and New Years Eve. I would stand inside the back door watching my parents and all the neighbors shooting off fireworks in the yard with terror. I would stand there with the phone in one hand (for dialing 911) and a gallon jug of water in the other hand (for extinguishing any fires) and pray for it to be over soon.

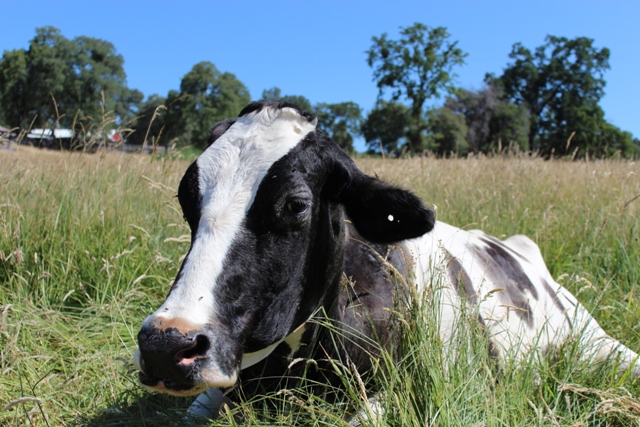
But this post is not about my neurosis around fireworks. This is a quick post to introduce the idea of ‘animal testimonies’. Head on over to Our Hen House today to read a short piece on how sharing the testimonies of animals can be a form of activism, following in a long tradition of human forms of giving testimony. In it, I share Sadie’s story as well, picture above. And an exciting bit of news–the lovely ladies at Our Hen House have asked me to join their flock. I’m so excited to be part of the flock and can’t wait for lots more writing projects in the future.